Being the owner or administrator of a given Organization, you can:
- create new processes
- edit existing processes
To do this, from the main menu on the left side, click the + Build Process button
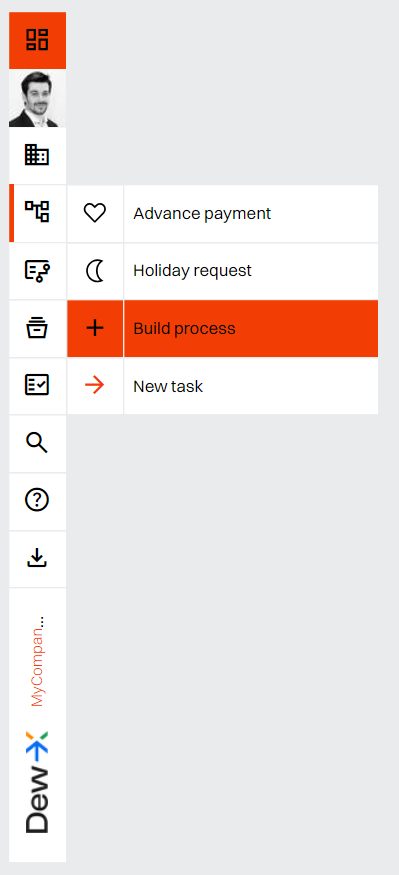
Note: If you are not the administrator or owner of any Organization, this button will not be available to you. It will also disappear when you switch to an Organization where you do not have these permissions.
More about the roles and permissions in the System: click
Creating a process is divided into several steps
I. Choose the method of creating the process definition
- Create new process By choosing this path, you will build a completely new process yourself, using the process definition builder. Remember that you can alternatively modify one of the ready-made templates – in this case, select “Use template”.
- Use template To create a new process definition, you can use one of the ready-made templates – prepared by the Dew-X team or your own. The uploaded template can be freely modified.
- Upload file If you have your own file or a file received from someone with a previously prepared process, upload it here and start editing it. It does not matter if it is a flow/processing of a document or a case.
You make your choice on the screen

If you chose method 3. Upload file – upload it and then proceed as for editing the process, you can read about it here: click
If you chose method 2. Use template go to the Process templates section
If you chose method 1. Create new process, continue reading
II. Decide which of the two types of processes you want to build
- Process will start with a document The first step in these processes is adding a file, e.g. invoices, letters or contracts. A preview of the document (PDF, graphic) will be displayed next to the form.Popular processes of this type include the flow of invoices, office of incoming letters, agreement acceptance. Other documents can be added as attachments.
- Process will start without a document This is a process that does not require a document to begin. The user will fill in a form without previewing a document. Popular processes of this type include a purchase application, support application, and vacation application. Documents can of course be added as attachments.
You make your choice on the screen

III. Specify the basic parameters
- Choose a symbol that will help you identify the processNote: do not attach too much importance to this – the icon has no substantive connection with the process. You will be able to change it late
- Name the process a unique name (in a given Organization)
- Determine what its first activity will be
![]()
![]()
IV. Build the first and following forms
Each form should have some fields. In the Dew-X process definition builder, we implemented fields and ready-made components that we called plugins.

Fields come in several forms:
– text – textarea – number – amount – yes/no – date – date range – attachment – link – e-mail
Hint: if you want the user to be able to add multiple attachments, links or e-mails, then the fields: attachment, link, e-mail, add only once – by completing the form, you will be able to add any number of them.
For each field, specify whether it is required or not. In the first case, if the user does not fill it in, he will not be able to proceed further.
If it is worth adding a header, information or instruction before the field – insert the plugin “Section description” there.
You can read more about plugins here: click
You can change the order of added fields and plugins on a given form using the drag and drop method.

Fields and plugins can also move between activities
Select the pencil icon on the toolbar of a given plugin or field and indicate to which activitiy it should be moved

The moved field will disappear from the given activity and will appear at the end of the list on the selected one.
When you finish a given activity / form, go to create the next activity/ form:
- by defining its name
- specifying the deadline
- deciding what will happen when this activity is not performed (e.g. due to the expiration of the deadline) Two options are available: Undo or End process
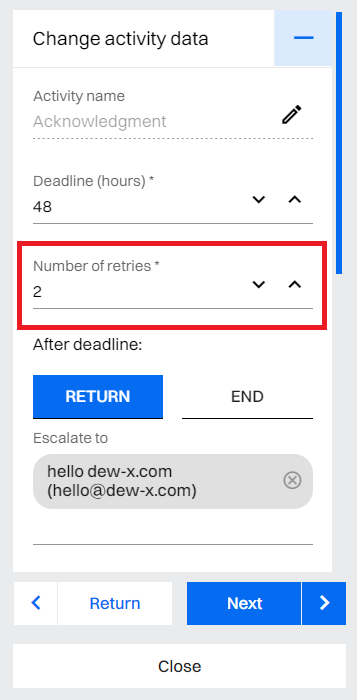 The default value is “0”. This means that a task that is not completed before the deadline according to the definition, will go back to the previous one or end at the given activity. Value of “1” is one additional chance; “2” is two, that is, including the base time, three cycles, etc. Note: when sending a task the user can change the execution time set in the definition once. This change will only affect the first cycle. If retries have been set, they will last as long as it was assumed for this activity in the process definition. Each time a user fails to complete a task that has the retry option enabled (value greater than 0) they will receive an email notification informing them that they have just been given an additional chance to complete it. Escalate to If there is a reason to inform other people in the organization about the non-completion of a task, use the “Escalate to” option.
 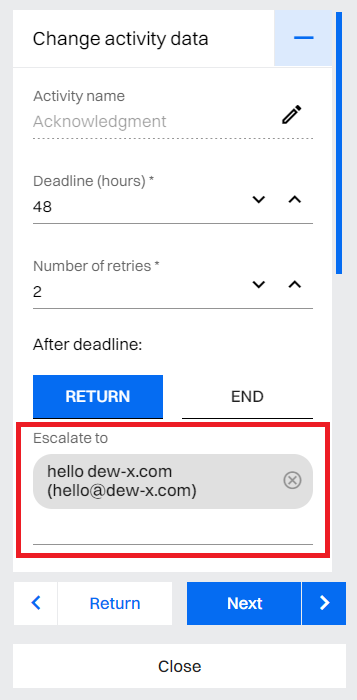 In this item, for each activity (except the first one), you can specify the user or users who will receive an e-mail notification each time, informing who, in which activity, in which process and in which organization did not complete the task on time. Timecops (that’s what we call them) can only be people belonging to the organization, both with “inside” and “outside” status. Note: in special situations the timecop may not have the permissions to access the contents of a task, such as when they have not participated in the task or have not been CC’ed and they do not have administrative rights. If a retry is provided for the activity, the timecop will receive a notification each time the deadline of a given cycle expires.
Ending the process at a given activity
You can allow a certain process to be completed before all the activities provided have been completed. This will be the action that the user who performs the activity can select as an alternative to forwarding the task.
To allow such a possibility, at a given activity select Yes in the section “The process can be ended at this activity”

You can do this at one or more different activities in the process.
Default performer in the process
If a given activity is to be performed by a specific user by default, you can select them from the list:

Notes:
Only users from inside a given Organization will be on the list, but if they have not accepted joining it yet, selecting them will not be possible.
In the course of the process, the person performing the task will be able to consciously change the addressee or indicate multiple addressees for the next activity.
If it is easier to build an activity on the basis of an existing one, use the functionality called Duplicate Action.
This feature is used to duplicate an entire activity in a process.
It can come in handy when the next activities in the process have similar fields, e.g. there are many Approvals.

The duplicate activity will appear last, but by using the Reorder feature (mentioned above) you can place it anywhere in the process.
Of course, each of the resulting activities can then be edited to give them separate characteristics.
Note:
We recommend that you think about using the same field names in the next activities of the process, because in the case of fields with the same names in the report (more about reports: click) in the summary sheet, only the last, final value is presented. If your goal is to present each of these fields separately, call them different names, e.g.:
– in the HR activity: HR Approval (instead of Approval)
– on the activity Legal Department: Legal Approval (instead of Approval)
– at the Management Board activity: Management Board approval (instead of Approval)
You can change the order of activities in the process using the drag and drop method available in the menu on the right side of the screen

V. Select highlighted fields
Specify from 1 to 3 variables (“Highlighted fields” option) that are worth showing on the tab of a given process instance

Hint: for vacation requests, this can be, for example: name, last name and date range, and for invoices: name, tax ID and net amount. These fields will be visible on the task tab without going into its details.
Note: when the form with the selected highlighted variables is sent to multiple people to be completed, the values filled in by them will not be displayed on the tab of the instance.VI. Publishing
When you finish creating the last activity, select Publish

from now on, it will appear on the list of processes in a given organization and will be available for use.
Each process can also be Saved as a file
You can save your work to a file at any time by creating or editing a process.
To do this, select Close in the menu on the right and then Save as file.

Save the file to a location of your choice on the disk.
This file can be used when creating a new process.
In this case, in the builder/creator, in the first activity, select the option I have a process file.
Do not worry – you can edit a process multiple times (read more about editing an existing process here), refining it endlessly, even when users start using it.